
Table of Contents
“A party without cake is just a meeting.” – Julia Child’s iconic words remind us that desserts transform moments into memories. Today, we’re reimagining a classic favorite into a showstopping layered treat that balances tradition with modern simplicity.
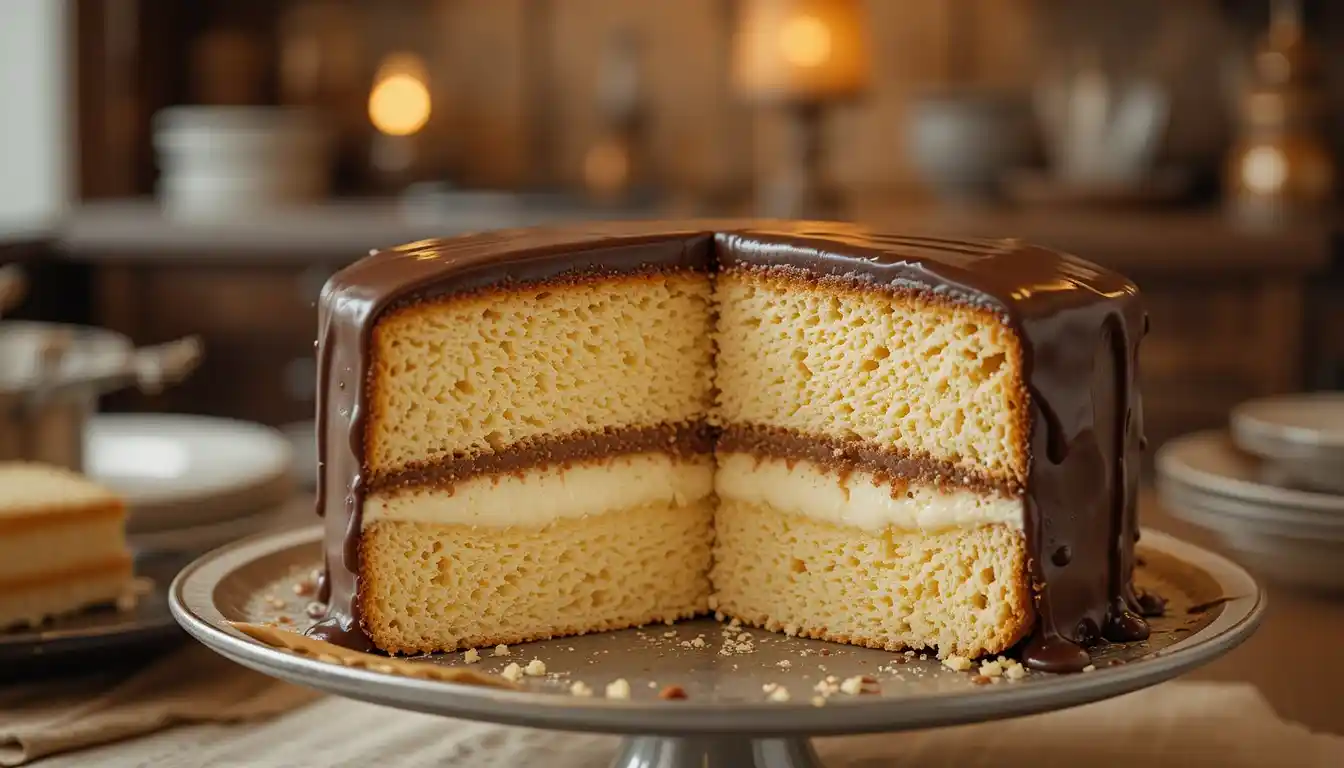
This spin on the beloved Boston Cream Pie swaps pastry layers for tender sponge cake, paired with silky custard and glossy chocolate glaze. You’ll master it effortlessly using pantry staples and clever shortcuts. Whether hosting birthdays or casual dinners, this dessert delivers elegance without stress.
We’ll walk through every detail: the origins of the original 19th-century creation, ingredient swaps for dietary needs, and pro tips for flawless assembly. Discover how to balance moist texture with rich flavors that impress even seasoned bakers. Ready to create something unforgettable?
Introduction to Boston Cream Cake
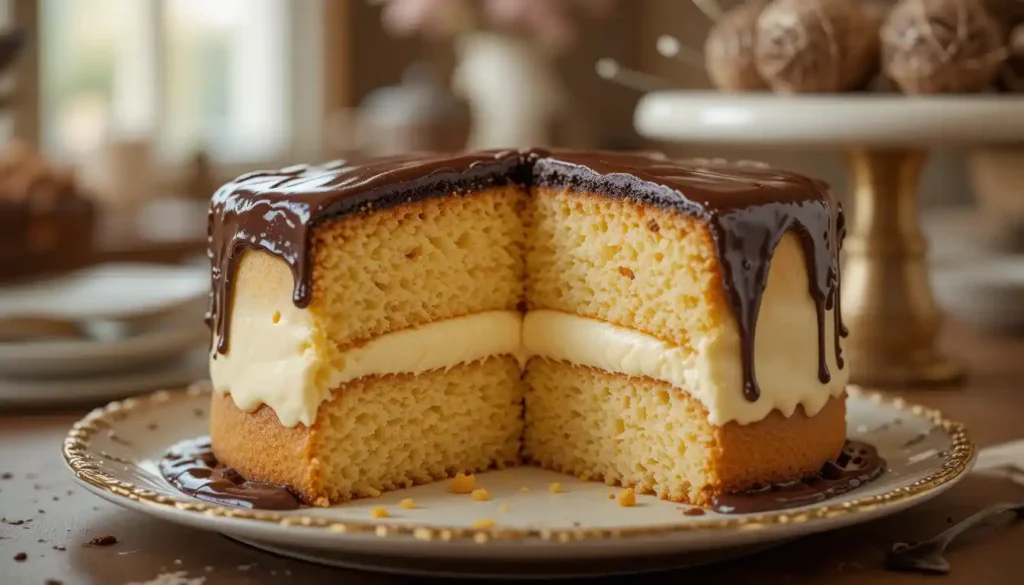
What happens when a 19th-century pastry innovation meets modern kitchen convenience? Magic. This dessert masterfully layers airy vanilla sponge with velvety custard and glossy chocolate – a trio that’s stood the test of time while adapting to today’s busy lifestyles.
Why This Dessert Stands Out
Unlike standard layer cakes, this treat walks the line between pie and sponge dessert. The magic lies in its contrasts: light yet rich, nostalgic yet accessible. Bakers love how the components work together – each bite delivers cloud-like texture, cool creaminess, and bittersweet chocolate notes.
Your Roadmap to Success
We’ll guide you through two approaches: traditional from-scratch methods and clever shortcuts using instant pudding and boxed mix. The filling combines whipped topping with vanilla custard for a lush consistency that holds its shape. Golden yellow cake layers get their tenderness from simple swaps like milk instead of water in the batter.
Up next, we’ll explore how this dessert evolved from its pie origins and share pro techniques for assembling showstopping layers. You’ll discover why home cooks and professional chefs alike consider this recipe a cornerstone of American baking.
The History Behind Boston Cream Treats
Ever wondered how a hotel dessert became America’s official state sweet? The story begins in 1856 at Boston’s Parker House Hotel. French chef Augustine François Anezin revolutionized desserts by layering pastry with custard and chocolate – a European technique adapted for American tastes.
From Pie to Modern Masterpiece
Originally called “Parker House Chocolate Cream Pie,” this treat used cake-like layers instead of traditional pie crust. Early recipes required hours of hand-whisking custard over open flames. Today’s methods to make Boston cream simplify these steps while honoring the original balance of textures.
Three key factors shaped its evolution:
- Industrial ovens allowed consistent baking of delicate sponge layers
- Pre-packaged ingredients made custard filling made accessible to home cooks
- Mid-20th century boxed mixes inspired creative variations
Chefs still debate whether it’s truly a pie or cake. What’s undeniable? The pastry’s legacy lives through modern twists like cupcakes and gluten-free versions. Each bite connects you to 160 years of culinary innovation.
Next time you make Boston cream desserts, remember: you’re continuing a tradition that transformed hotel kitchens into nationwide obsessions. The secret? Mastering that perfect harmony between airy layers, velvety center, and glossy finish.
Key Ingredients for a Perfect Boston Cream Cake
What transforms ordinary components into a layered masterpiece? The answer lies in carefully chosen elements that create harmony between soft sponge, velvety center, and glossy finish. Let’s explore the building blocks that elevate this dessert from good to unforgettable.
Cake Mix and Dry Ingredients
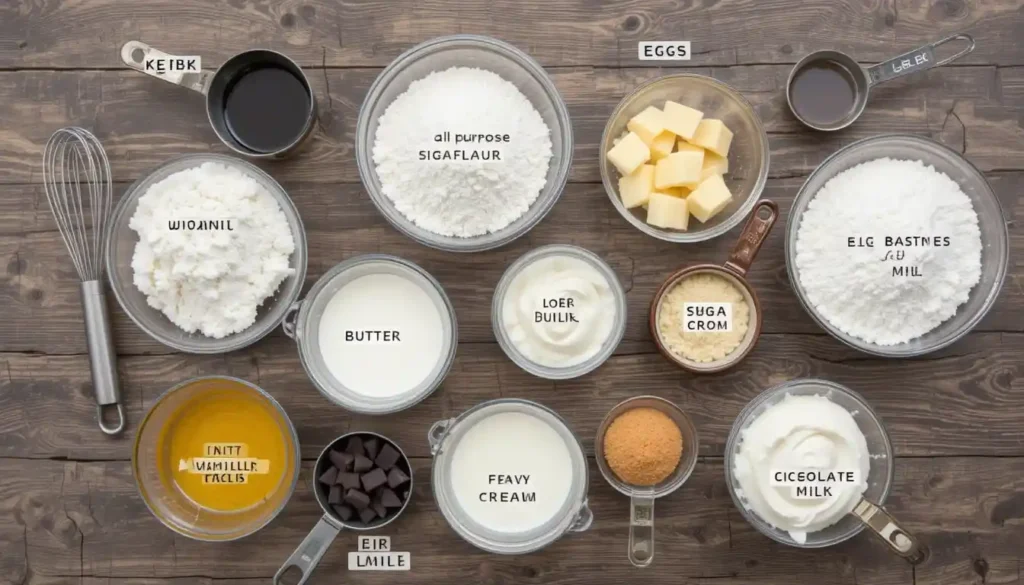
Your foundation starts with a yellow cake mix – the shortcut hero that ensures consistent results. Key players include:
- Sugar: Balances moisture retention with subtle sweetness
- Eggs: Provide structure while keeping layers tender
- Whole milk (instead of water) for richer crumb texture
Pro tip: Add 1 tsp almond extract to amplify vanilla notes without overpowering.
Cream Filling and Chocolate Ganache
The heart of this dessert thrives on contrast. For the filling:
- Instant vanilla pudding mix + heavy cream creates lush consistency
- Cornstarch prevents separation during refrigeration
The ganache demands high-quality chocolate (60% cocoa minimum) and pure vanilla extract. “Cheap chocolate won’t set properly or deliver that signature shine,” notes pastry chef Elena Martinez. Simmer heavy cream before pouring over chopped chocolate bars – this emulsion technique ensures silky draping over your layers.
Remember: Premium ingredients aren’t just about taste. They determine whether your creation holds its shape or becomes a sugary puddle. Every element works in concert – skimp on one, and the whole symphony falters.
Prepping Your Baking Tools and Equipment
Why do some bakers consistently achieve picture-perfect results? It starts before the oven even preheats. Having the right arsenal transforms chaotic kitchen experiments into smooth, professional outcomes. Let’s unpack the gear that turns effort into elegance.
Essential Tools for a Successful Bake
Your foundation starts with three non-negotiables: a sturdy mixer, heat-conductive bowl, and flexible silicone spatula. Opt for 8” or 9” round pans – their size ensures even heat distribution. Line them with parchment paper after greasing to guarantee clean releases every time.
Pro tip: Use scissors to trim paper liners flush with pan edges. This prevents uneven browning and maintains your layers’ shape. A digital scale beats measuring cups for precision, while an angled spatula simplifies frosting later.
Organize your workspace like a pro:
- Keep wet and dry ingredient bowls separate
- Pre-measure everything before mixing
- Wipe surfaces between tasks to avoid flavor crossovers
With these tools ready, you’ll spend less time troubleshooting and more time crafting. Remember: Great desserts aren’t just made – they’re engineered with intention.
boston cream cake recipe: Step-by-Step Instructions
Transform simple ingredients into a layered masterpiece through these precise steps. Timing and technique matter most here – follow each stage carefully to achieve bakery-quality results at home.
Baking the Cake Layers
Start by preheating your oven to 350°F. Whisk together dry ingredients in one bowl and wet components in another. Combine them gradually until the batter becomes smooth – overmixing causes dense layers.
Divide the mixture evenly between two greased 9-inch pans. Bake for 22-25 minutes. Test doneness by inserting a toothpick – it should emerge clean with just a few crumbs attached.
Preparing the Cream Filling
While layers cool, make the velvety center. Blend instant pudding mix with cold milk using a hand mixer. Fold in whipped topping until airy peaks form. Chill for 15 minutes to thicken without becoming stiff.
Making the Chocolate Ganache
Simmer heavy cream until steaming, then pour over chopped dark chocolate. Let sit for 2 minutes before stirring into a glossy glaze. Cool slightly until it thickens but remains pourable – about 8-10 minutes.
Pro tip: Work quickly once components are ready. Assemble while layers are slightly warm to help the filling adhere without sliding.
Baking Tips and Tricks for Success
What separates a cloud-like dessert from a dense disappointment? Mastery lies in timing and technique. Let’s break down the science behind achieving airy perfection every time.
Essential Techniques for Perfect Structure
Test doneness by inserting a toothpick. If it emerges with just a few crumbs, you’re golden. “Comes clean” doesn’t mean bone-dry – residual heat finishes baking as layers cool.
| Technique | Key Action | Result |
|---|---|---|
| Toothpick Test | Insert at 45° angle | Prevents underbaked center |
| Mixing Time | 90 seconds maximum | Avoids gluten overdevelopment |
| Chilling Layers | 45 minutes minimum | Sets filling stability |
| Oven Adjustments | Check every 5 minutes | Prevents overbrowning |
Always make sure to track mixing durations with a timer. Even 15 extra seconds can create tough textures. For ovens running hot or cold:
- Reduce temperature by 25°F if edges darken too fast
- Add 3-5 minutes baking time for older appliances
Chill assembled layers for at least two hours. This crucial step lets the custard firm up without hardening. “Rushing this stage causes sliding layers,” warns pastry instructor Marco Diaz.
Remember: Precision beats speed. Those extra seconds monitoring your batter or adjusting racks pay off in tender, sky-high results worth savoring.
Assembling Your Boston Cream Cake
Think of this stage as edible architecture – every movement shapes your dessert’s final form. Precision here determines whether your creation stands tall or becomes a delicious casualty. Let’s transform components into a cohesive showstopper.
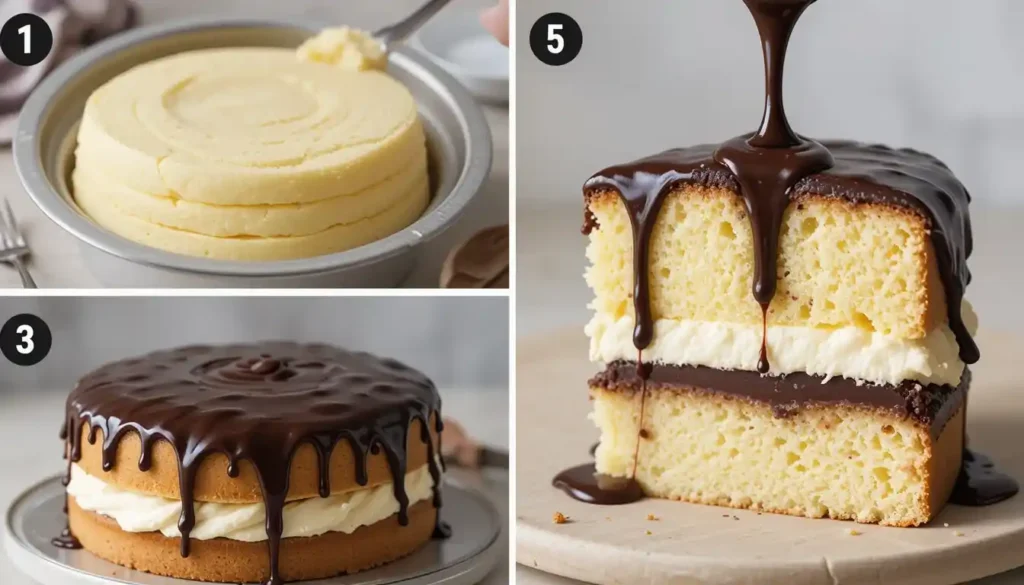
Layering the Components
Place your first sponge round on a non-slip surface. Use a piping bag or spoon to distribute the filling evenly, leaving a ½-inch border. “This prevents spillage when adding the second layer,” advises pastry chef Lydia Weston. Chill for 10 minutes before stacking – cold layers grip better than room-temperature ones.
Perfecting the Glaze Finish
Pour warm ganache at the center’s highest point. Let gravity pull it toward the edges in smooth ribbons. Rotate your stand while guiding the flow with an offset spatula for uniform coverage. For clean sides, scrape excess glaze upward in one continuous motion.
Three golden rules for structural integrity:
- Work on a turntable for 360° control
- Chill between each major step
- Use room-temperature tools – cold utensils cause premature setting
Remember: Imperfections add charm. A slightly uneven drip pattern or visible layering tells your guests this was crafted by human hands, not machines. That’s where the magic lives.
Storing and Serving Suggestions
Preserving your dessert’s elegance requires smart storage strategies and thoughtful serving techniques. Whether you’re prepping for a party or saving leftovers, these guidelines ensure every slice stays fresh and flavorful.
Best Practices for Refrigeration
Always use a cake refrigerator or airtight container to protect delicate layers from absorbing odors. Chill at 34-38°F – colder temperatures harden the filling, while warmer ones risk spoilage. For best results:
- Place dessert on the middle shelf, away from raw ingredients
- Cover with plastic wrap pressed directly onto exposed surfaces
- Consume within 3 days for optimal texture
How to Serve for Maximum Enjoyment
Remove from the refrigerator 30 minutes before serving. This softens the custard without making layers soggy. Use a warm knife for clean cuts – dip the blade in hot water and wipe between slices.
Pair with:
- Bold coffee to balance sweetness
- Fresh berries for tart contrast
- Toasted nuts for crunch
Leftovers? Freeze individual portions in foil for up to a month. Thaw overnight in your cake refrigerator before enjoying. Remember: Proper storage isn’t just about safety – it’s the secret to maintaining that first-bite magic.
Creative Variations and Adaptations
Who says classic desserts can’t reinvent themselves for modern occasions? Miniature versions let guests enjoy personalized portions while keeping the essence of your favorite layered treat intact. Perfect for bake sales or dessert boards, these adaptations require minimal effort but deliver maximum charm.
Mastering Individual Servings
Transform standard cake mix into bite-sized delights using muffin tins and liners. Fill each cup halfway with batter to prevent overflow – a ¼ cup measure ensures consistency. Bake at 325°F for 18-20 minutes, checking for springy tops. Cool completely before injecting custard filling with a piping tip.
Three adjustments guarantee success:
- Reduce oven temperature by 25°F to avoid dry edges
- Use a cookie scoop for uniform cup portions
- Chill ganache slightly thicker than usual for drip control
Experiment with baking molds like jars or shot glasses for playful presentations. Layer crumbled sponge, pudding, and chocolate in clear containers for instant visual appeal. These twists keep the signature contrast of fluffy layers and rich filling while adding portability.
Hosting a crowd? Prepare components separately and let guests assemble their own mini desserts. Provide toppings like toasted coconut or crushed cookies for customized creations. The magic lies in balancing tradition with innovation – every tiny treat tastes like the original masterpiece.
Pairing the Cake with Other Desserts or Meals
How do you balance decadence without overwhelming your guests? The answer lies in strategic pairings that enhance rather than compete. This layered creation shines brightest when accompanied by contrasting textures and flavors that highlight its luxurious elements.
Complementary Flavors and Sides
A chilled glass of whole milk cuts through the richness beautifully. The cool creaminess washes over the palate, resetting taste buds between bites. For dairy alternatives, try almond or oat milk lightly warmed with cinnamon.
Seasonal fruits add vibrancy to each plate. Summer berries bring tartness, while caramelized apples in fall offer cozy warmth. Arrange sliced peaches or pears alongside for effortless elegance.
Light pastries create harmony on dessert tables. Lemon scones or almond biscotti provide crunch without overshadowing the main attraction. Balance sweet and savory with cheese boards featuring aged cheddar or mascarpone.
Three rules for crowd-pleasing spreads:
- Include one bold flavor (dark coffee granita)
- One textural contrast (crisp tuile cookies)
- One familiar favorite (vanilla bean ice cream)
Don’t shy away from savory companions. Salted caramel popcorn clusters or rosemary shortbread add unexpected depth. The key? Let your star dessert guide the supporting cast while milk remains the classic partner for midnight leftovers.
Conclusion
Mastering this dessert combines tradition with modern ease. You’ve learned how quality ingredients build balanced textures, why precise mixing prevents dense layers, and when to chill components for stable assembly. Each step – from selecting chocolate to timing the glaze – contributes to that iconic harmony of flavors.
Now’s your moment to shine. Try the base version first, then tweak fillings or toppings to match your style. Swap vanilla custard for espresso-infused cream or garnish with edible flowers. The process rewards patience but forgives playful experimentation.
Remember why this treat endures: its perfect ratio of tender sponge to velvety richness transcends trends. What began as hotel innovation now thrives in home kitchens because it works. Follow the guidelines, but make it yours – that’s how classics stay relevant.
Share your creations proudly. Tag photos online or swap stories at family gatherings. Every slice you serve continues a delicious legacy. Ready to taste history reimagined? Your oven’s waiting.
FAQ
What’s the difference between Boston cream pie and cake?
The classic pie is technically a cake—two sponge layers with custard and chocolate glaze. Modern versions use cake flour for a lighter texture, while pies often have a thicker, denser crumb. Both share the same iconic filling and topping.
Can I substitute ingredients if I’m dairy-free?
Yes! Use plant-based milk and butter alternatives for the batter. For the custard, opt for coconut cream or dairy-free pudding. Dark chocolate with coconut oil works well for the ganache.
How do I prevent the layers from crumbling during assembly?
Chill the baked sponge in the refrigerator for 30 minutes before slicing. A serrated knife helps create clean cuts. Brush layers with simple syrup to add moisture and reduce breakage.
Can I make this dessert ahead of time?
Absolutely. Prepare the components separately—store the sponge wrapped in plastic, custard in an airtight container, and ganache in a jar. Assemble up to 4 hours before serving for freshness.
Why is a stand mixer recommended for the batter?
A stand mixer ensures even aeration, which creates a light, fluffy crumb. Hand mixers work too, but you’ll need to beat the eggs and sugar longer to achieve stiff peaks.
Can I turn this into cupcakes?
Yes! Bake the batter in a muffin tin for 18–20 minutes. Fill each cupcake with custard using a piping bag, then dip the tops in warm ganache for a bite-sized treat.
How long does the assembled dessert stay fresh?
It keeps well in the refrigerator for up to 3 days. Cover it loosely with plastic wrap to prevent the glaze from smudging. Let it sit at room temperature for 15 minutes before serving.
What’s the secret to a glossy chocolate glaze?
Use high-quality dark chocolate (60–70% cocoa) and heavy cream. Heat the cream until steaming, pour it over chopped chocolate, and let it sit for 2 minutes before stirring. Avoid overheating to prevent separation.
Can I skip the custard and use whipped cream instead?
Whipped cream is lighter but less stable. For a similar texture, stabilize it with gelatin or use a thick pastry cream blend. Traditional custard offers the richest flavor and structure.
1 thought on “Delicious Boston Cream Cake Recipe”
Comments are closed.